How To Thread A Elna 8006 EnVision Sewing Machine.
Learn how to thread your Elna Sewing Machine using this easy step-by-step tutorial.
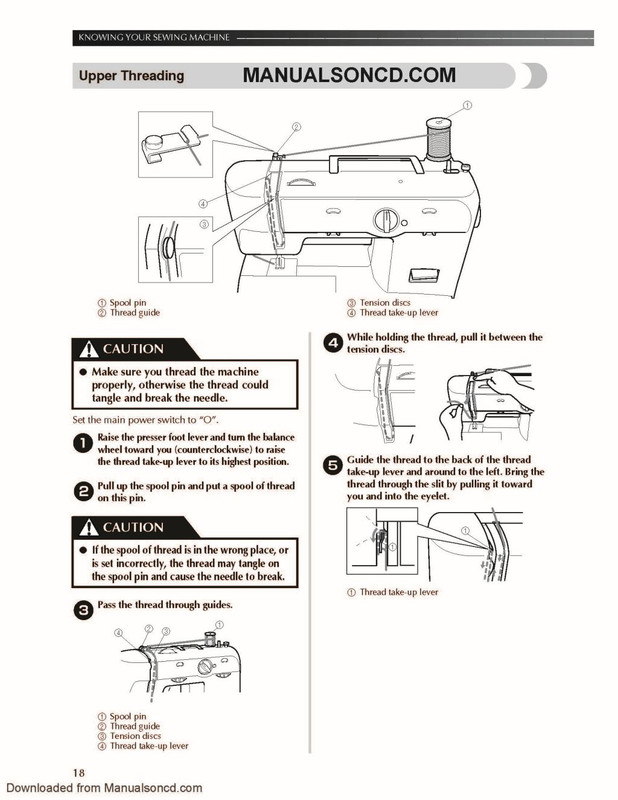
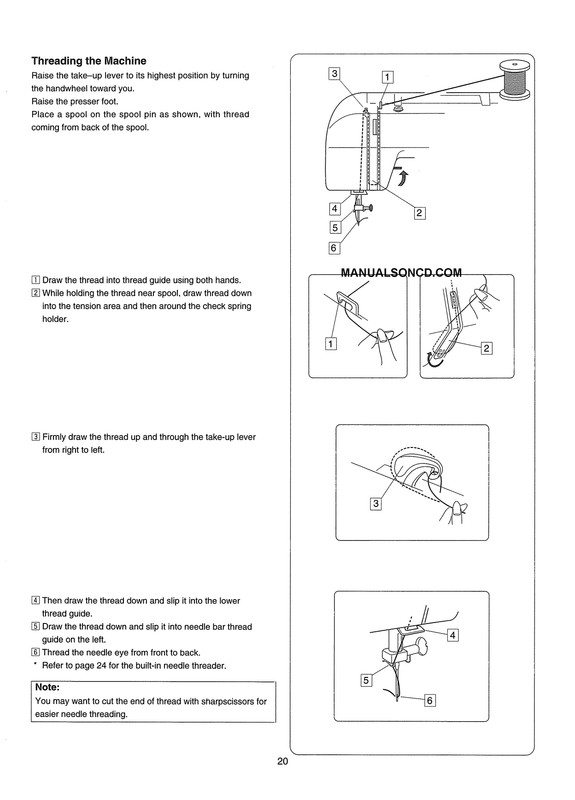
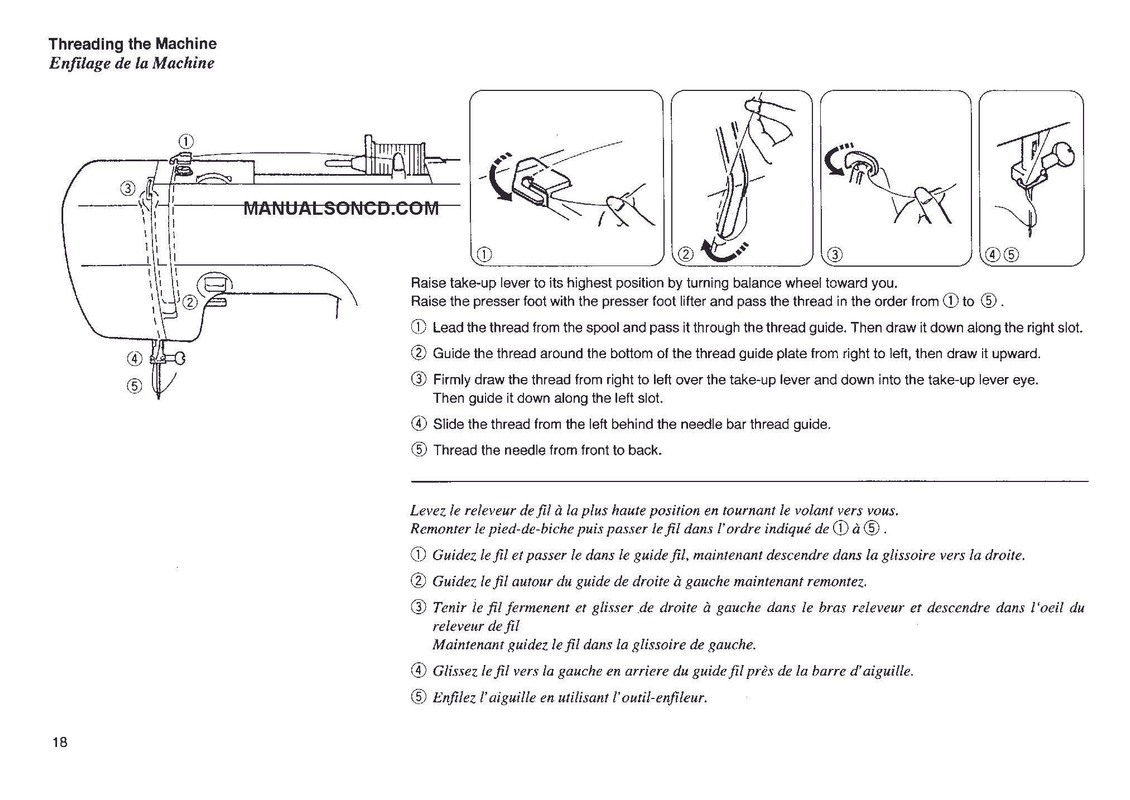
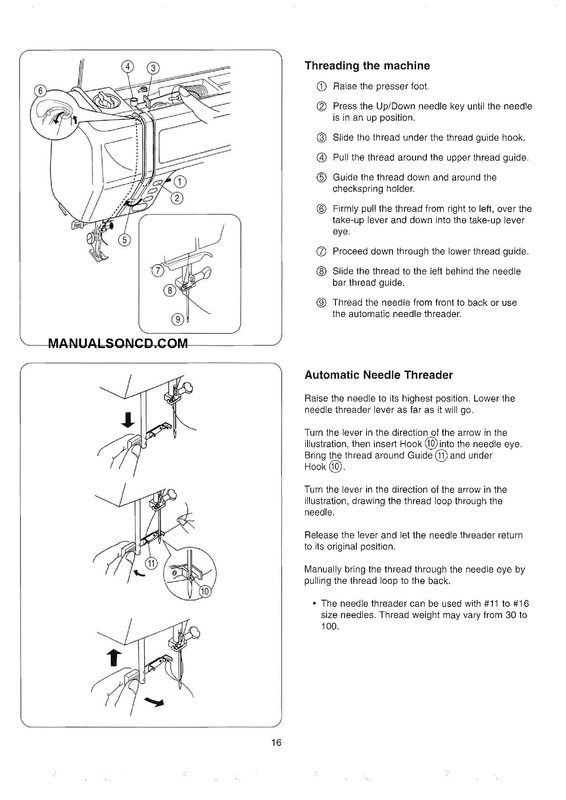
Threading the Machine
UPPER (NEEDLE) THREAD
1. Raise the presser foot.
2. Press the Up/Down needle key until the needle is in an up position.
3. Slide the thread under the thread guide hook.
4. Pull the thread around the upper thread guide.
5. Guide the thread down and around the checkspring holder.
6. Firmly pull the thread from right to left, over the take-up lever and down into the take-up lever eye.
7. Proceed down through the lower thread guide.
8. Slide the thread to the left behind the needle bar thread guide.
9. Thread the needle from front to back or use the automatic needle threader.
Automatic Needle Threader
Raise the needle to its highest position. Lower the needle threader lever as far as it will go.
Turn the lever in the direction of the arrow in the illustration, then insert Hook (10) into the needle eye. Bring the thread around Guide (11) and under Hook (10).
Turn the lever in the direction of the arrow in the illustration, drawing the thread loop through the needle.
Release the lever and let the needle threader return to its original position.
Manually bring the thread through the needle eye by pulling the thread loop to the back.
The needle threader can be used with #11 to #16 size needles. Thread weight may vary from 30 to 100.
The numbered steps above follow the numbers on the illustrations.
Dotted lines show places where the thread loops and then is pulled tight.
You can find additional Elna user – owner manuals available in our shop.
Please feel free to contact us if you have any questions about this manual.
You can view these manuals on your device or download the manual to save or print as well.
PDF download
You can get the complete instruction manual here.
Includes: Adjusting tensions, bobbin winding, changing needles, remove and replace bobbin case, zigzag, programming stitches, and much more.