Added new checkout option and secure checkout

Just a quick note that we added an additional checkout processor for an easy checkout.

We added Stripe . They accept all major credit cards . We have worked with them for years on our other sites and like them a lot.


We also added SSL to our site and have a secure checkout to insure your privacy.


Have fun with your sewing.


Singer 221 Sewing Machine Timing

Singer 221 Sewing Machine Timing

We added the Singer 221 sewing machine service manual if you need to make adjustments to your machine.

The manual includes great diagrams and helpful hints.


Singer 221 Sewing Machine Timing

TO POSITION HOOK TO OR FROM NEEDLE

Check:

Remove throat plate and turn hand wheel over toward operator until lower timing mark on needle bar is at lower edge of needle bar bushing on its upward stroke. With needle bar in this position, the distance between the side of needle and point of hook, as shown in insert in Fig. 16, should be .005″. This is approximately the thickness of a piece of ordinary note paper.


Setting:

Loosen counterbalance set screw, Fig. 16, and move counterbalance away from bushing. Loosen one hook set screw. Turn balance wheel toward operator to position needle bar as instructed above. Loosen the other hook set screw and bushing set screw. Using a 1/4″ brass drift pin, gently tap bushing to left or right as required. Press hook assembly against bushing and tighten hook and bushing set screws. Re- check setting and replace counterbalance with hub against bushing.


Hook timing:

Preparation:

Set needle bar height and position of hook to or from needle as previously instructed.


Check:

With needle threaded, turn hand wheel over toward operator until needle bar reaches lowest point and rises to position where lower timing mark on needle bar, Fig. 17, is just visible at lower edge of needle bar bushing. With needle bar in this position, the point of the hook should be approximately 1/16″ above the needle eye and entering the needle thread loop.

Setting:

Remove bottom cover. Loosen rotating hook shaft pulley set screws, Fig. 18, or hook shaft bevel gear set screws in gear driven machines. Turn shaft manĀ­ ually until point of hook is in its correct position to the needle eye and needle thread loop, as shown in Fig. 17. While holding hook in this position, tighten set screws in pulley or beveled gear.

CAUTION: In gear driven machines, do not disturb mesh of bevel gears


More on Singer 221 Sewing Machine Timing can be found in the service manual.

Singer 221 sewing machine service manual


Elna Carina SU Sewing Machine Instruction Manual

Elna Carina SU Sewing Machine Instruction Manual


The Elna Carina SU Sewing Machine Instruction Manual covers operation, minor adjustments and more for the class 65 and 66.
Explains what type of foot and setting required for different fabrics. Examples include sewing stretch and knitted fabrics.
Included a maintenance page as well as hints for various problems you might encounter.

Includes:

* Bobbin winding and threading.
* Threading the machine.
* Flat bed to free arm conversion.
* Accessories.
* All the different stitches and attachments.
* Lubrication and much more.

95 page instruction manual.


Elna Carina SU Sewing Machine Instruction Manual


New Sewing Machine Manual Website

Well not new since we have been in business since 2008 but we decided to get a redesign.
Hopefully the site design is easy to navigate for everyone.

We have included a contact form in case you have any questions before ordering.

Let us know if we missed anything in our rush to get the site back up.

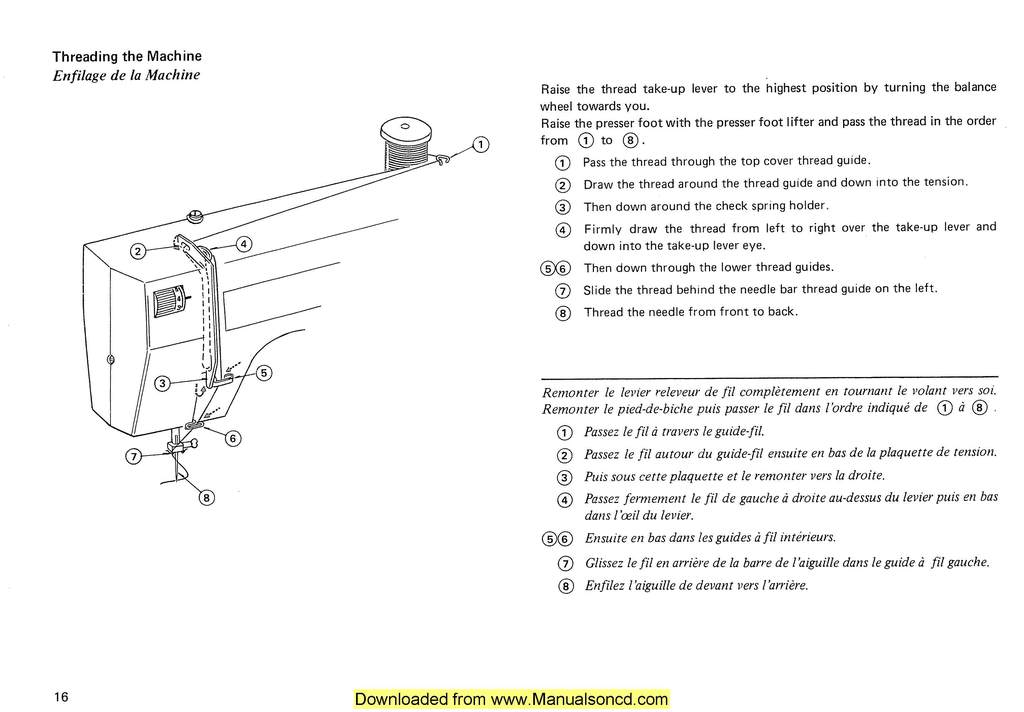
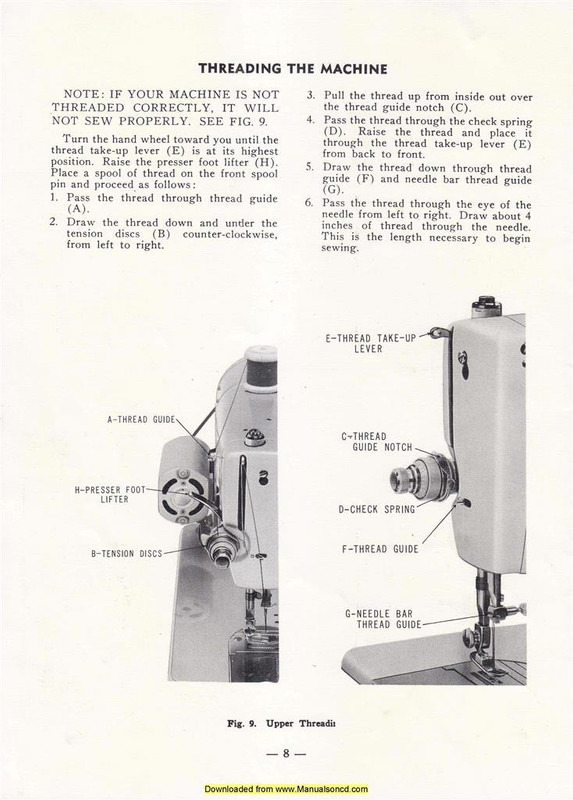
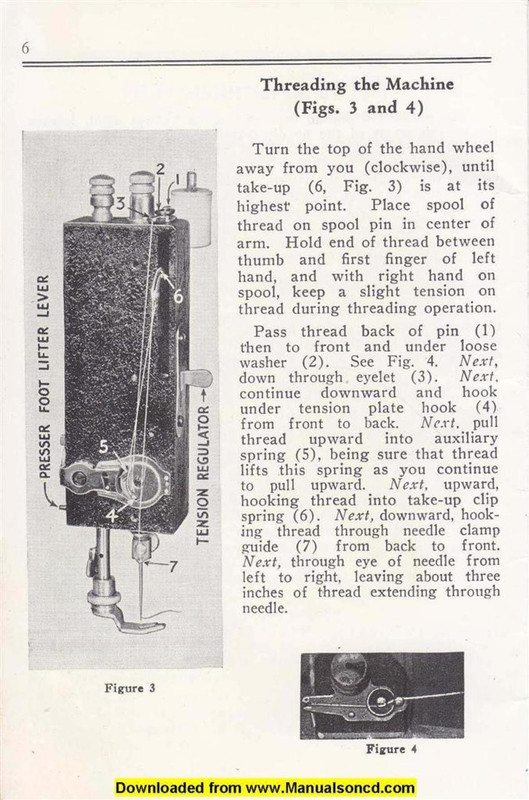
We will be adding a section with free sewing manuals and free threading diagrams and guides.

Thanks
Sewing Machine Manuals