How to Thread the Singer 362 Fashion-Mate Sewing Machine | Step-by-Step Threading Guide.
Learn how to thread your Singer Sewing Machine using this easy step-by-step tutorial.
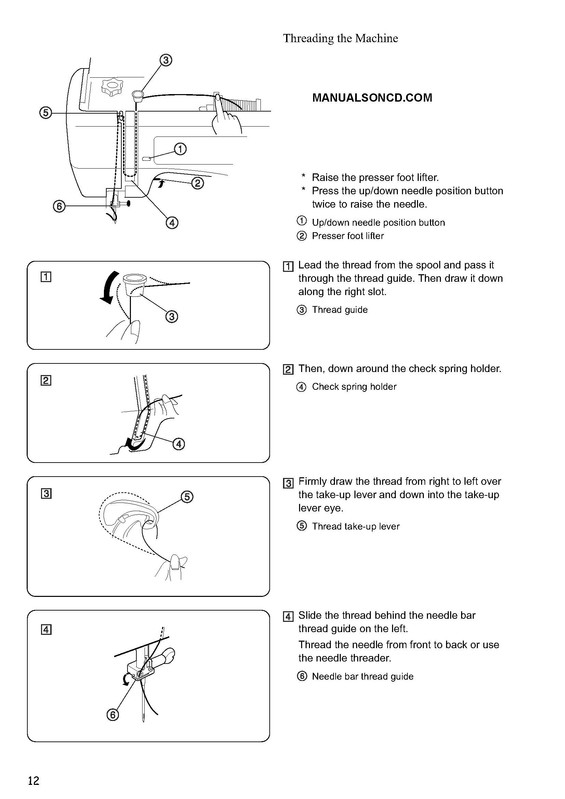
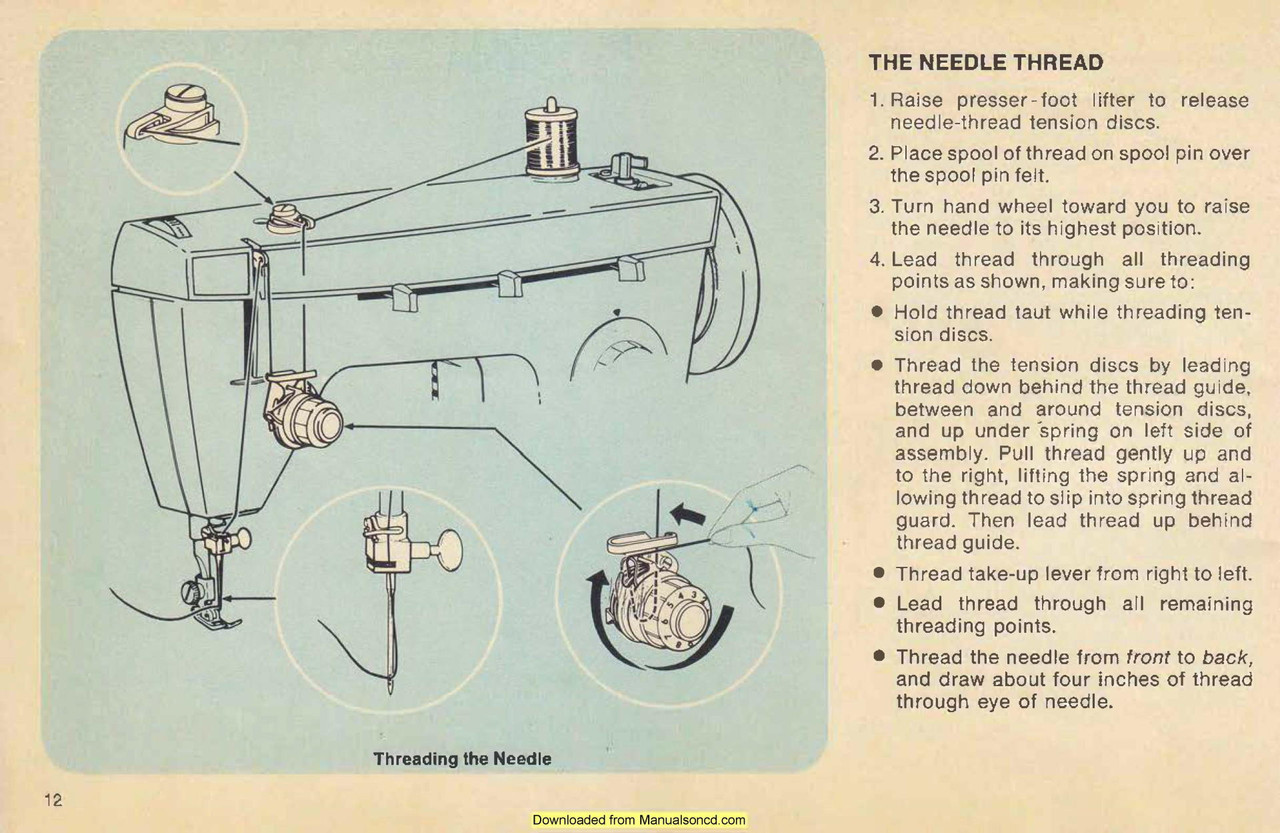
The Needle Thread
1. Raise presser-foot lifter to release needle-thread tension discs.
2. Place spool of thread on spool pin over the spool pin felt.
3. Turn hand wheel toward you to raise the needle to its highest position..
4. Lead thread through all threading points as shown, making sure to:
• Hold thread taut while threading tension discs.
• Thread the tension discs by leading thread down behind the thread guide,
between and around tension discs, and up under ·spring on left side of assembly.
Pull thread gently up and to the right, lifting the spring and allowing thread to slip into spring thread guard.
Then lead thread up behind thread guide.
• Thread take-up lever from right to left.
• Lead thread through all remaining threading points.
• Thread the needle from front to back, and draw about four inches of thread through eye of needle.
RAISING THE BOBBIN THREAD
Now that you have wound the bobbin and threaded the needle, you will need to raise the bobbin thread through the hole in the needle plate.
1. Hold needle thread lightly with the
left hand and turn hand wheel slowly
toward you so that needle enters
needle plate.
2. Continue turning hand wheel and
holding needle thread until needle
rises and brings up bobbin thread in
a loop.
3. Undo the loop with your fingers.
4. Place both needle and bobbin threads
under the presser foot and draw them
to back of machine .
You can find additional Singer user – owner manuals available in our shop.
Please feel free to contact us if you have any questions about this manual.
You can view these manuals on your device or download the manual to save or print as well.
PDF download
You can get the complete instruction manual here.
Includes: Adjusting tensions, bobbin winding, changing needles, remove and replace bobbin case, zigzag, programming stitches, and much more.