New Home Janome JW5622 Sewing Machine Threading Instructions.
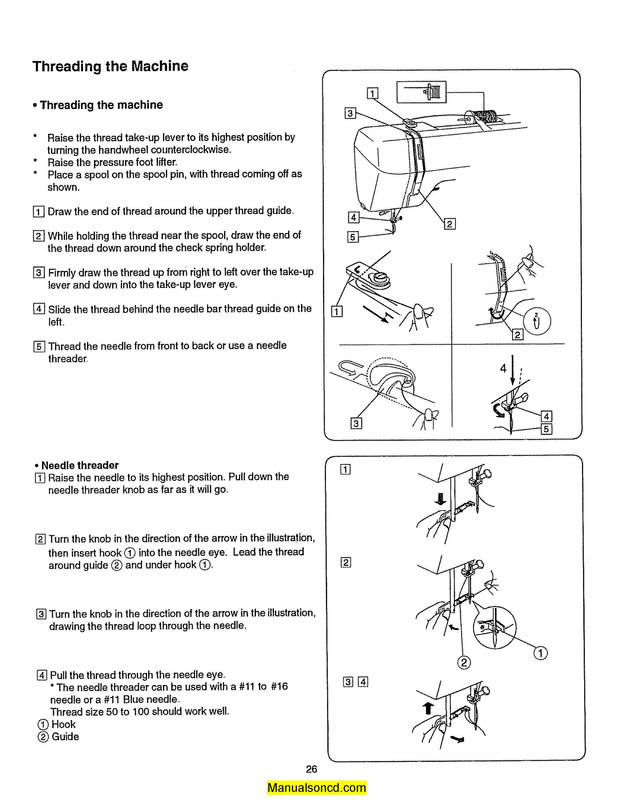
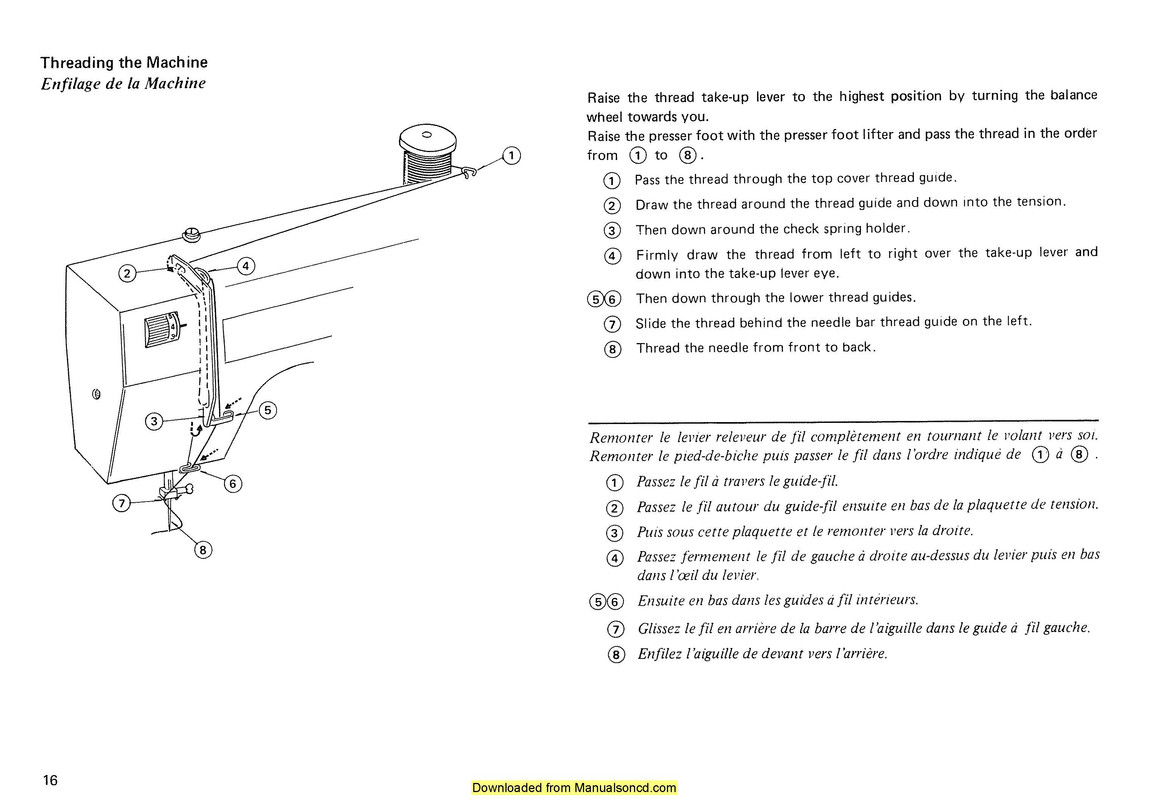
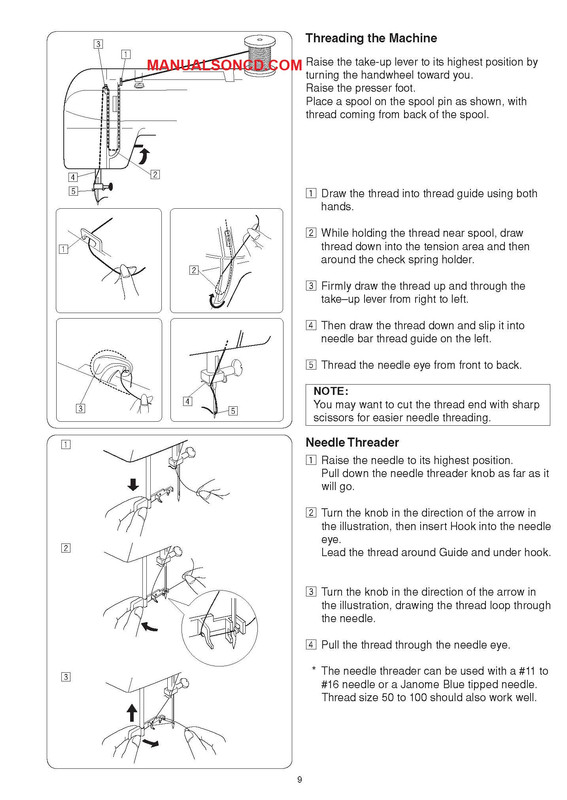
Threading the Machine
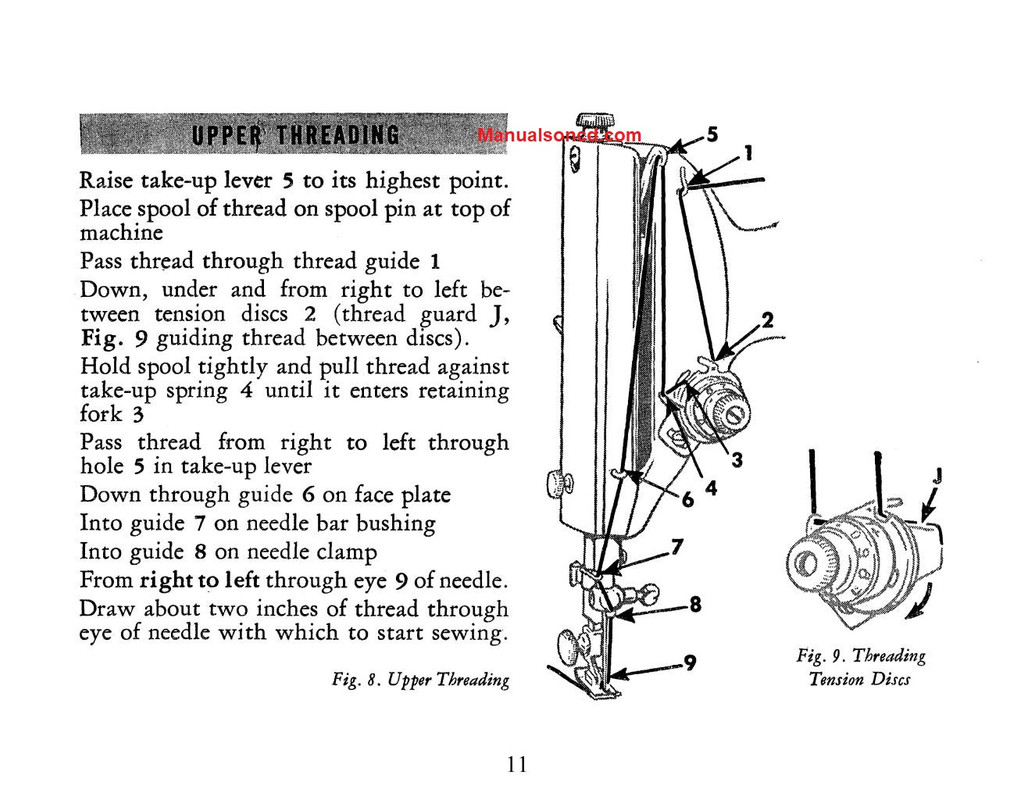
Raise the take-up lever to its highest position by turning the handwheel toward you.
Raise the presser foot.
Place a spool on the spool pin as shown, with thread coming from back of the spool.
1. Draw the thread into thread guide using both hands.
2. While holding the thread near spool, draw thread down into the tension area and then around the check spring holder.
3. Firmly draw the thread up and through the take–up lever from right to left.
4. Then draw the thread down and slip it into needle bar thread guide on the left.
5. Thread the needle eye from front to back.
You can find the complete instruction manual here.
New Home Janome JW5622 Sewing Machine Threading Instructions