
Kenmore 158.17300 – 1730 Sewing Machine Instruction Manual
$5.95
This is a download manual. Please check your email after purchasing.
Description
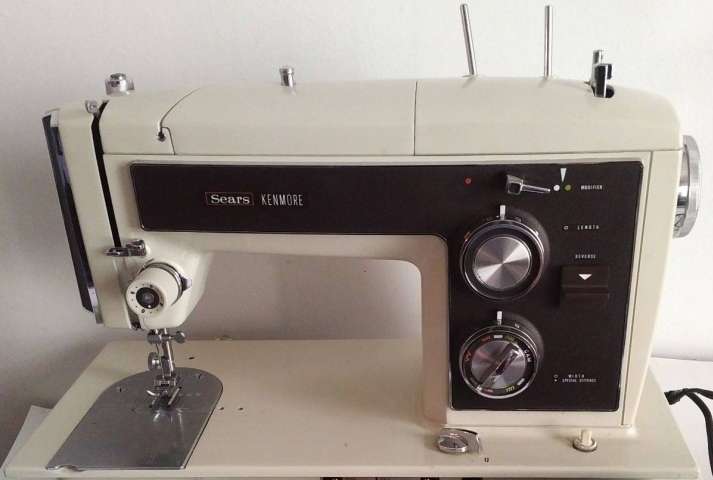
Kenmore 158.17300 – 1730 Sewing Machine Instruction Manual.
Includes:
Machine threading.
Changing needle.
Bobbin winding.
Thread tension adjustment.
Stitch width control.
Special stitch dial.
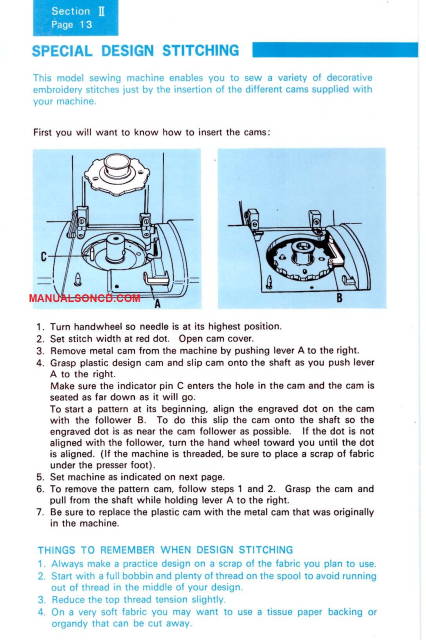
Design cams.
Feed dog control.
Buttonhole attachment.
Presser feet.
Zigzag stitching.
Stretch stitching.
Double needle stitching.
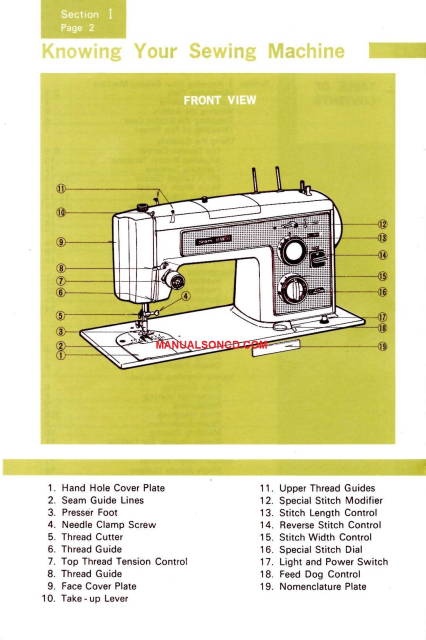
Multi-purpose needle plate.
Zipper application.
Checking performance problems and what to do checklist.
Oiling your machine.
Cleaning.
Much more!
55 page instruction/owners manual.
Kenmore models:
158.17300
158.1730
Kenmore 158.17300 – 1730 Sewing Machine Instruction Manual.
Winding the bobbin on your Kenmore 158.17300 Sewing Machine
1. Draw thread from spool pin through bobbin winder tension disc as shown in Figure 1.
2. Wind thread around an empty bobbin several times as in figure 2.
3. Place bobbin onto bobbin winder shaft with a thread wound on bobbin clockwise.
Push bobbin winder latch against bobbin until it clicks.
4. Release clutch by pulling hand wheel as shown in figure 4.
Start machine, holding on to end of thread.
5. When bobbin is slightly filled, release end of thread.
When bobbin is full, winding mechanism stops.
6. Push in hand wheel to return to switching position.
Remove bobbin.
Checking tensions
To check the thread tension balance, be sure to use mercerized thread of the same size on the top and on the bobbin , and a sharp, correct size needle for the fabric you are sewing.
Begin with a full bobbin.
Set the stitch length for about 12 stitches per inch.
Fold a 6 inch square of fabric in half diagonally, forming a triangle.
Make a line of stitching 1/2 inch from the fold.
a) If seam is puckered – both tensions are too tight.
b) If the bobbin thread lays on the fabric – tighten upper thread tension and repeat test.
See figure 3 page 9.
c) If the top thread lays on the fabric – loosen upper thread tension, and repeat the test.
See figure 2 page 9.
Grasp the stitching and pull with the snap to make threads break.
a) If both Reds break – tensions are balanced.
b) If neither thread breaks – most both tensions are too loose.
c) If upper thread breaks – loosen top tension.
d) If lower thread breaks – tighten top tension.
Both threads do not have to break at the same place, but they should break it on the same snap.
It is necessary to reduce the upper thread tension somewhat when the zigzag stitching.
The wider the stitch, the less tension that is needed.
This is particularly important when making designs.
It is not desirable to have any bottom thread visible on the right side of the fabric when making designs.
Kenmore 158.1730 Sewing Machine Instruction Manual
Kenmore sewing machine manuals
1 review for Kenmore 158.17300 – 1730 Sewing Machine Instruction Manual
1-1 of 1 review
Add a review
Currently, we are not accepting new reviews
Perfect! Thank you! Highly recommend