Singer 20U Sewing Machine Threading Instructions

Singer 20U Sewing Machine Threading Instructions.

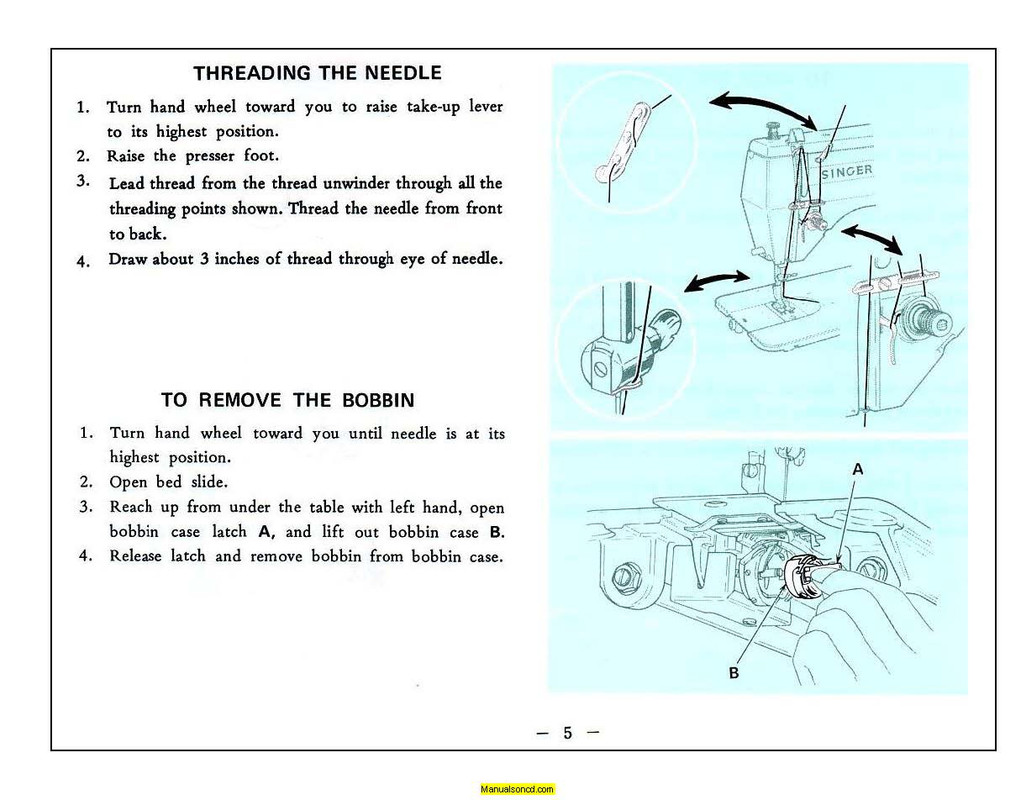
Threading the needle

1. Turn the hand wheel toward you to raise take up lever to its highest position.
2. Raise the presser foot.
3. Lead thread from the thread unwinder through all through the threading points shown.
Thread the needle from the front to the back.

4. Draw about 3 inches of thread through the eye of the needle.

If you need the complete instruction manual, you can find it here.

Singer 20U Sewing Machine Instruction Manual.


Needle position selector

Left, Center and right needle position settings are available for placement of both straight and zigzag stitching.
To position, push lever in and move to the desired setting.
Center settings is preferred for normal sewing.
Setting left and right are only used when special placement of stitching is desired.
For example: buttonholes, button sewing.
Do not make any needle position adjustment while the needle is in the fabric.


How to control the width of zigzag stitch

The two thumb screws provided on front of arm allow you to control the width of Zigzag stitches.
The thumb screw A is used to control the width of the wider zigzag stitch and the thumb screw B to control the narrow or zig-zag stitch.

1. To obtain minimum to maximum width zigzag stitches, first loosen thumb screw B to permit the stitch width regulator C to return to its zero position and retighten thumb screw B.
Then loosen thumb screw A, turn stitch width regulator C clockwise as far as it will go and while holding the regulator C in this position, retighten thumb screw A.
You can now regulate the stitch width regulator within the range of 0 to 9mm.

2. To make narrower zigzag stitches, for example, a 0 to 5 mm width zigzag stitches, loosen thumb screws A and B and retighten thumb screw B as explained above.
Then turn stitch width regulator C to 5mm settings and while holding regulator C, retighten thumb screw A.

Singer 20U Sewing Machine Threading Instructions