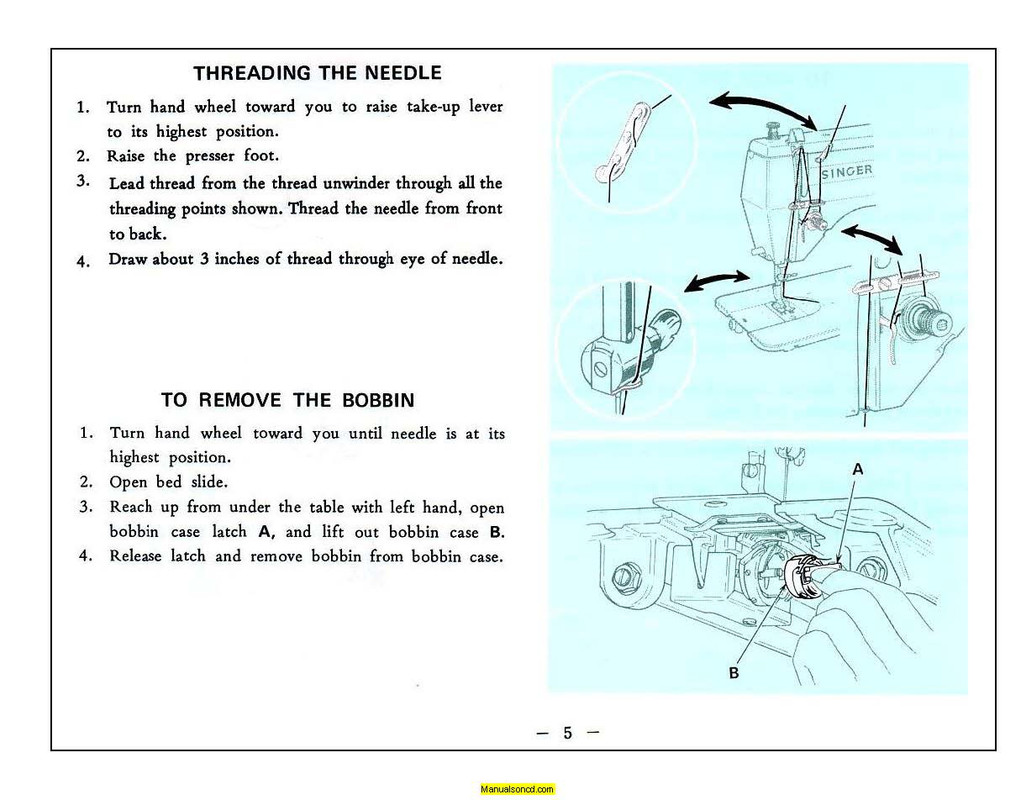
Janome 109 – 110 Sewing Machine Threading Instructions

Raise the needle take-up lever to the highest position by turning the balance wheel towards you.
Raise the presser foot with the presser foot lifter and pass the thread in the order below.
1. Pass the thread through the top cover thread guide.
2. Draw the thread around the thread guide and down into the tension.
3. Then down around the check spring holder.
4. Firmly draw the thread from the left to right over the take-up lever and down into the take-up lever eye.
5. Then down through the lower thread guide.
6. Slide the thread behind the needle bar thread guide on the left.
7. Thread the needle from front to back.
Janome 109 – 110 Sewing Machine Threading Instructions
You can find the complete instruction manual here.