Brother PS-3700 Sewing Machine Threading Instructions.
Threading Instructions
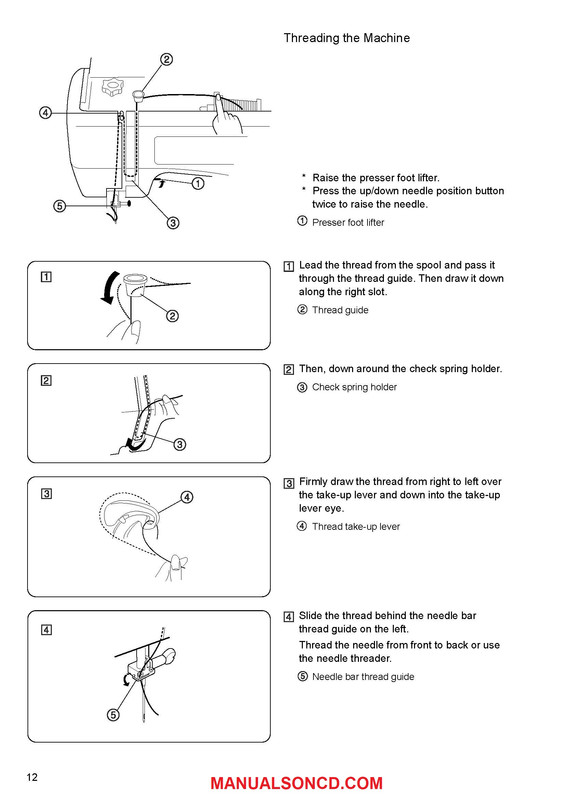
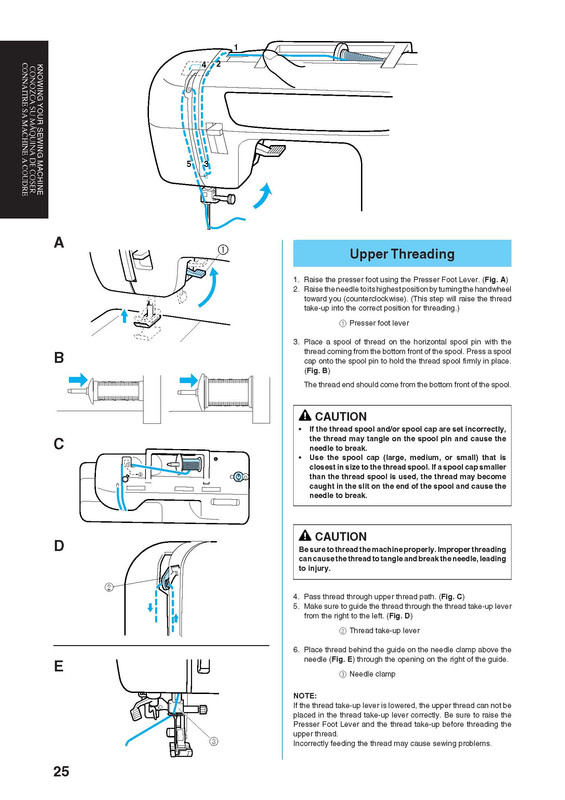
* Raise the presser foot using the Presser Foot Lever. (Fig. A).
1. Raise the needle to its highest position by turning the handwheel toward you (counterclockwise). (This step will raise the thread take-up into the correct position for threading.) 1 Presser foot lever
2. Draw thread from spool through the upper thread guide. (4)
3. Place a spool of thread on the horizontal spool pin with the thread coming from the bottom front of the spool. Press a spool cap onto the spool pin to hold the thread spool firmly in place. (Fig. B)
The thread end should come from the bottom front of the spool.
4. Pass thread through upper thread path. (Fig. C)
5. Make sure to guide the thread through the thread take-up lever from the right to the left. (Fig. D) 2 Thread take-up lever
6. Place thread behind the guide on the needle clamp above the needle (Fig. E) through the opening on the right of the guide. 3 Needle clamp
NOTE:
If the thread take-up lever is lowered, the upper thread can not be placed in the thread take-up lever correctly. Be sure to raise the Presser Foot Lever and the thread take-up before threading the upper thread.
Incorrectly feeding the thread may cause sewing problems.
CAUTION: Be sure to thread the machine properly. Improper threading can cause the thread to tangle and break the needle, leading to injury.
Brother PS-3700 Sewing Machine Threading Instructions
You can find the complete instruction manual here.