How To Thread A Janome QS2250 Sewing Machine.
Learn how to thread your Janome Sewing Machine using this easy step-by-step tutorial.
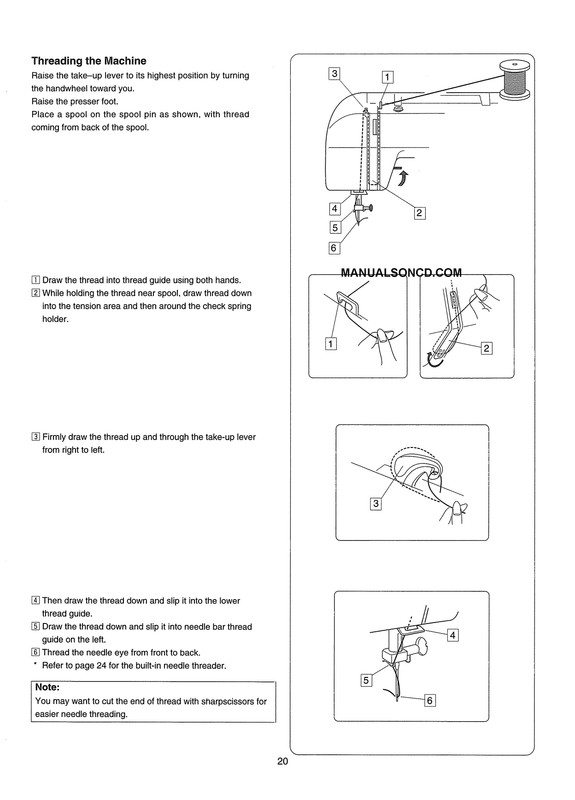
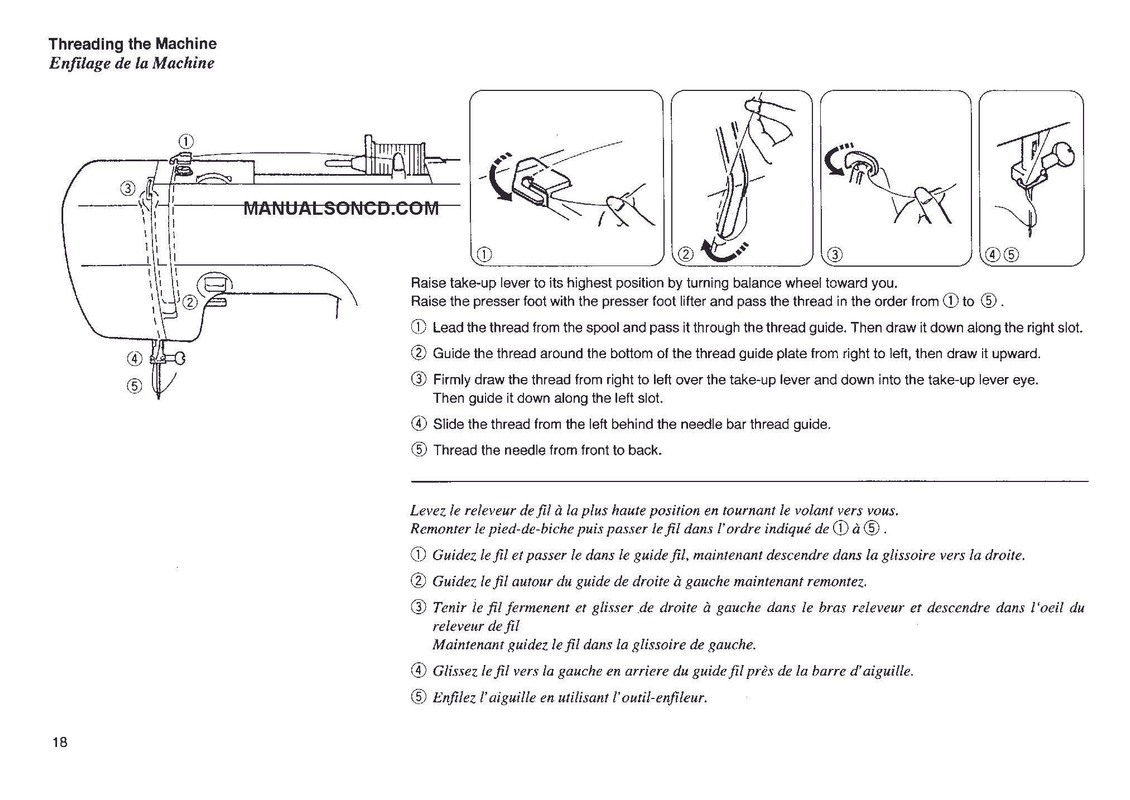
Threading the Machine
Raise the take-up lever to its highest position by turning the handwheel toward you.
Raise the presser foot.
Place a spool on the spool pin as shown, with thread coming from back of the spool.
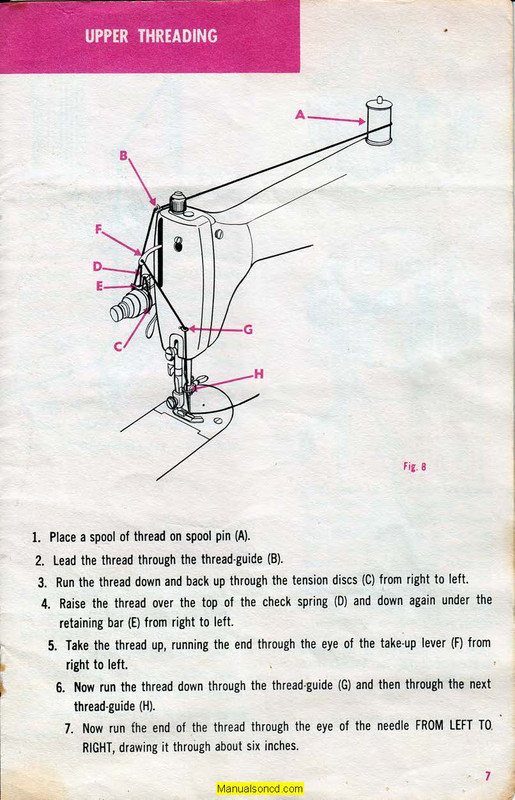
UPPER (NEEDLE) THREAD
1. Draw the thread into thread guide using both hands.
2. While holding the thread near spool, draw thread down into the tension area and then around the check spring holder.
3. Firmly draw the thread up and through the take-up lever from right to left.
4. Then draw the thread down and slip it into the lower thread guide.
5. Draw the thread down and slip it into needle bar thread guide on the left.
6. Thread the needle eye from front to back.
NOTE: You may want to cut the end of thread with sharp scissors for easier needle threading.
The numbered steps above follow the numbers on the illustrations.
Dotted lines show places where the thread loops and then is pulled tight.

You can find additional Janome and New Home user – owner manuals available in our shop.
Please feel free to contact us if you have any questions about this manual.
You can view these manuals on your device or download the manual to save or print as well.
PDF download
You can get the complete instruction manual here.
Includes: Adjusting tensions, bobbin winding, changing needles, remove and replace bobbin case, zigzag, programming stitches, and much more.