How to Thread Your Janome New Home DX2015 Sewing Machine.
How to Thread Your Janome New Home DX2015 Sewing Machine
Note: Before starting, ensure that the machine is turned off and unplugged for safety.
Threading the machine:
Take the spool pin holder and insert it into the hole at the top of the machine.
Note: Before starting, ensure that the machine is turned off and unplugged for safety.
Threading the machine:
Take the spool pin holder and insert it into the hole at the top of the machine.
Threading the machine:
Take the spool pin holder and insert it into the hole at the top of the machine.
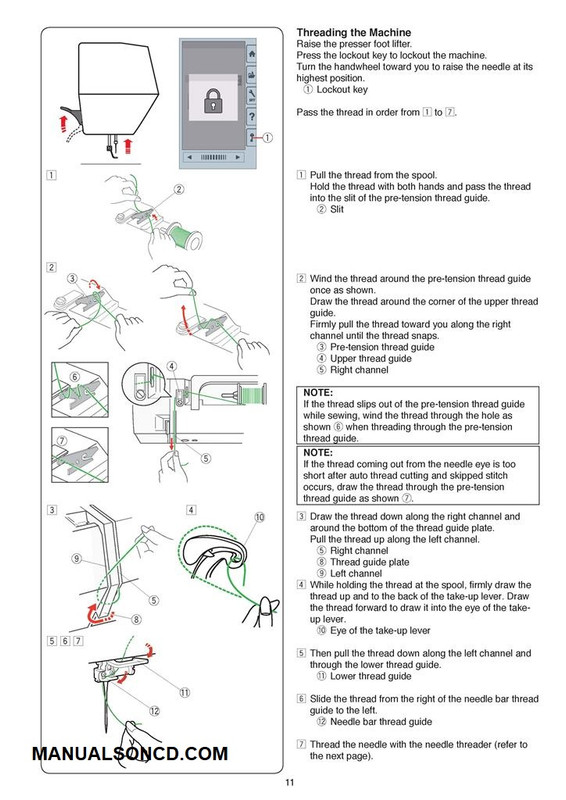
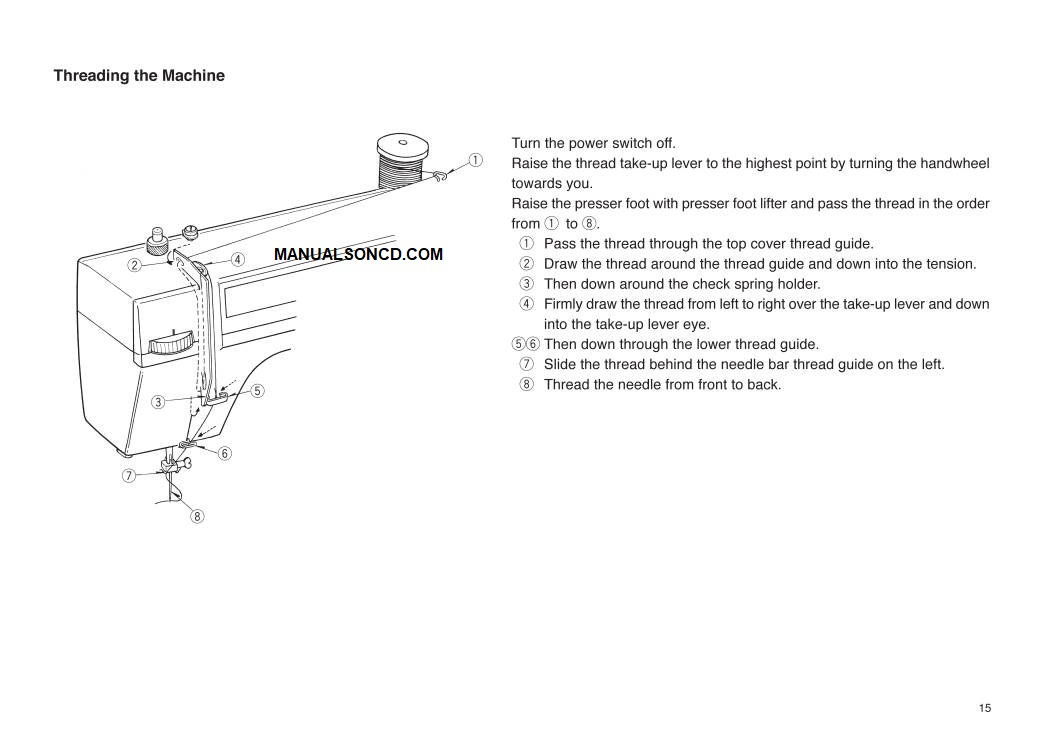
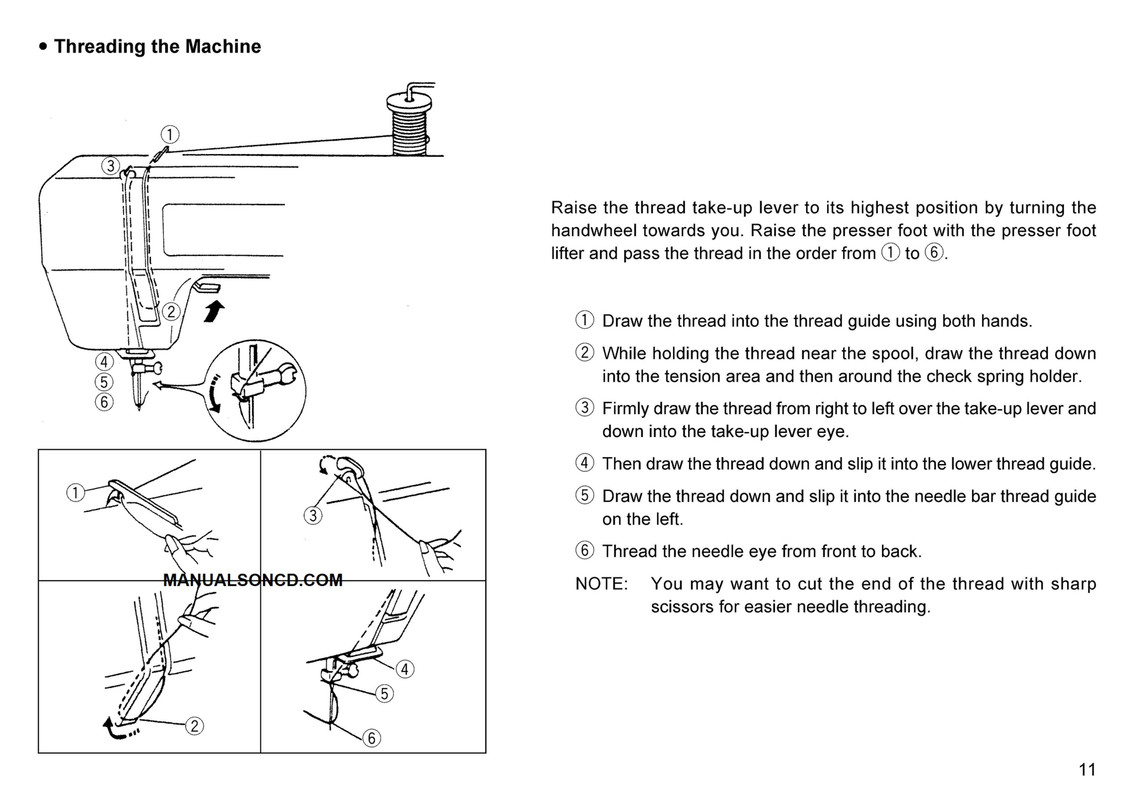
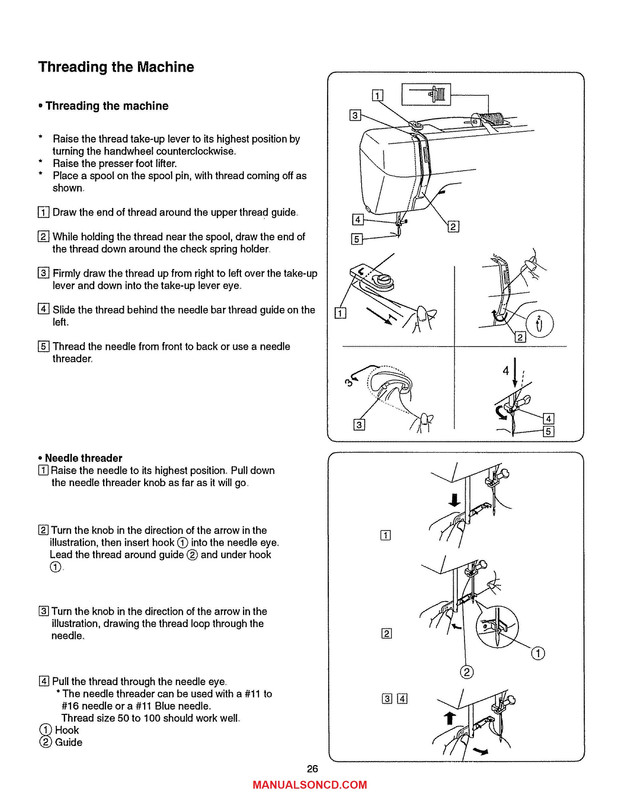
Raise the thread take-up lever to the highest point by turning the handwheel towards you.
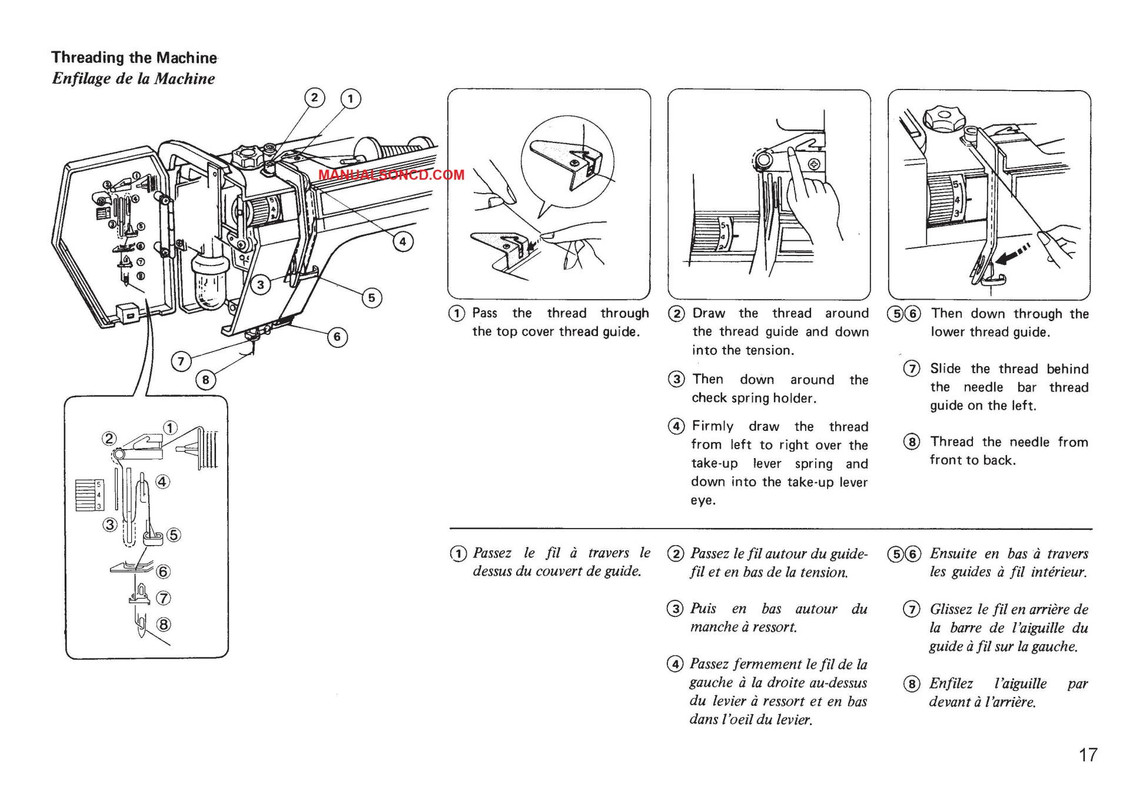
Raise the presser foot with the presser foot lifter and pass the thread in the order from 1 to 8.
1. Pass the thread through the top cover thread guide.
2. Draw the thread around the thread guide and down into the tension.
3. Then down around the check spring holder.
4. Firmly draw the thread from left to right over the take-up lever and down into the take-up lever eye.
5-6. Then down through the lower thread guide.
7. Slide the thread behind the needle bar thread guide on the left.
8. Thread the needle from front to back.
4. Final Steps:
a. Hold the upper thread and manually turn the handwheel toward you to lower the needle into the fabric.
b. Pull the upper thread slightly to bring up the bobbin thread.
c. Hold both threads together and pull them towards the back of the machine, under the presser foot.
d. Your Janome New Home DX2015 Sewing Machine is now threaded and ready to sew!
Remember to consult the machine’s user manual for additional guidance and specific instructions related to your model. Happy sewing!
How to Thread Your Janome New Home DX2015 Sewing Machine